There are a couple of lower priced options for your iPad available in the iTunes Store if you search for “ssh” (notably the $0.99 SSH Terminal) but as I haven’t had a chance to test them, I can’t compare functionality versus price so I’ll leave that up to you, if you’re so inclined.
I can say that the programmer clearly has put a lot of thought into the functionality of iSSH and it shows with the many, many setting and bookmark management features in the app.
Let me start by showing you how it works, though….
Launch the app on your Apple iPad and here’s what you’ll see:

To add a new connection, I’ll tap on “Add Configuration…” which brings up a number of preference options:

This is where you can specify the server name, your account name, etc. You can enter the password here and have it remember, but I’m more paranoid about security so I’d rather enter the password each time and not have it stored on my iPad. (a feature where you have to enter a password to launch iSSH, but then all of the individual account passwords are stored and accessible would be a nice upgrade).
I found that the most important setting for an SSH account in iSSH is to ensure that the app is going to use the entire iPad screen for the terminal, rather than reserve a big piece of screen real estate for a dual-window view. To get there, scroll down just a bit…

Tap on “Advanced Settings”. Now you’ll see:

The default should really be that it isn’t going to use the split screen, but perhaps I’m just a bit old-fashioned with terminal interfaces.
 Instead, just turn OFF “Enable Portrait Split View” on the bottom of this window.
Once you’re done setting things up, you’ll see the new bookmark show up on the main screen, as you can see here for my “intuitive.com” account:

Before you try it, I suggest you quick visit General Settings too, to make sure its configuration is what you’d prefer:

Finally, it’s all set, and I’m going to connect via SSH to my server. I tap on the “intuitive.com” bookmark and…

SSH users are familiar with the encryption key handshake: it’s exactly what you want to have happen the first time you connect to a secure server. To proceed, tap “Accept” and, since I didn’t store my account password in the bookmark configuration, I’ll see:

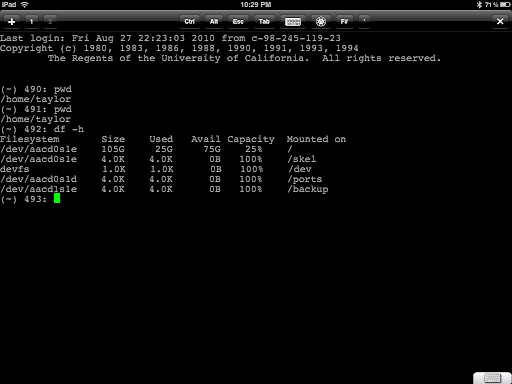
Looks good: I’m logged in and able to type commands directly:

One of the challenges of a Unix/Linux terminal on an iPad is that the virtual keyboard doesn’t include all the special keys you want to be able to interact with the server, notably control, alt, and arrow keys. iSSH solves that neatly with a small pop-up keyboard stirp along the bottom, as you can see.
Want to remove it? Tap on the keyboard icon on the lower right and it’ll drop out of sight:
Even cooler, tap and hold the screen for a second and the customizable command wheel shows up, offering easy access to even more specialized keystrokes that are otherwise impossible to produce on an iPad:

If you are going to leave the command key strip visible, you might want to go back to the settings and select “Adjust Terminal Size Above Solid Keyboard”, as you can see here:

Finally, it wouldn’t be an iPad app if you couldn’t rotate it and reorient it for your favorite configuration. iSSH supports that just fine:

In summary, $9.99 is pretty expensive for an iPad app in a world of free and $0.99 apps, but when I need to securely connect to my server I’d pay a lot more than $10 for the ability to bring it back online, check against hackers breaking in, tweak some settings, or whatever. It’s a solid app and shows a nice evolutionary path as it’s been upgraded since my original purchase. If you’re in the market for an SSH app for the iPod or iPad, I encourage you to check out iSSH [iTunes link] for the Apple iPad.
Disclosure: The developer sent me a promo code for this review, so I didn’t pay for the app. But I would so that I have an emergency SSH solution when on the road…
The post Review: iSSH for the iPad/iPhone appeared first on Ask Dave Taylor.